
Using a single USB printer on several computers isn’t the simplest task: you have to either connect the printer to each computer separately, share it from one (and start it up every time you need to use the printer) or, my personal choice, set it up on a Raspberry PI and share it with the world.
The information provided here covers the second half of the setup process – the client side of things. For the PI / CUPS server setup, you can read this tutorial. The steps below assume that the printer is already configured and available via CUPS.
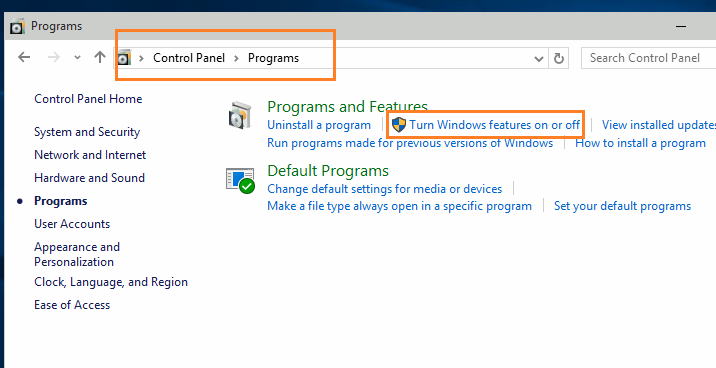
Start by making sure IPP printing is enabled on Windows.
Go to Control Panel > Programs (in Windows 10 Control Panel is in the popup list when right-clicking on the Start button) and select Turn Windows Features On or Off.
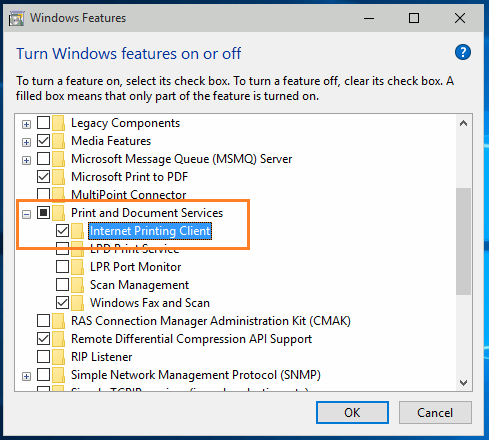
In the features list, scroll down to Print and Document Services and verify that the Internet Printing Client checkbox is checked.
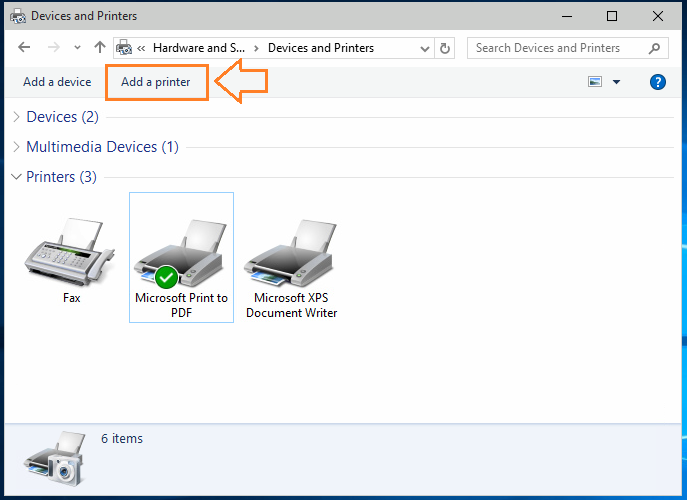
Navigate to View Devices and Printers in Control Panel (it’s in the Hardware and Sound group), click the Add a Printer button
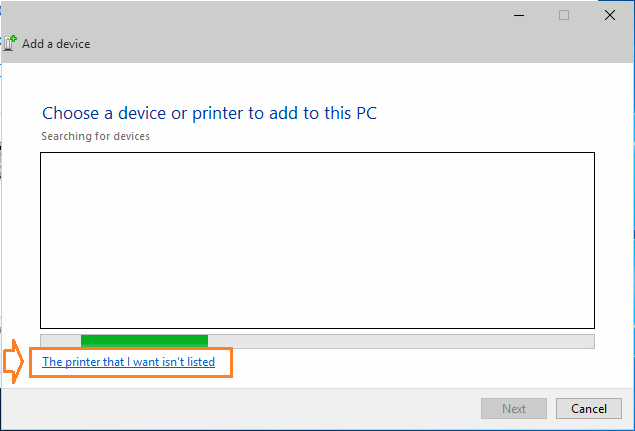
Then click the The printer that I want isn’t listed link at the bottom of that dialog.
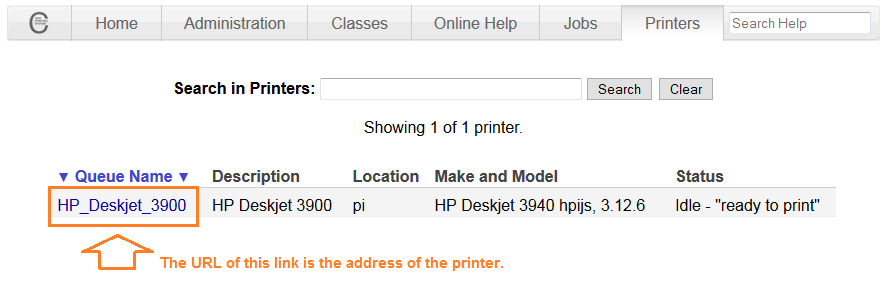
Select the Select a shared printer by name option and type in the address of your printer (which you can find in CUPS, in the Printers tab).

You can use either the hostname of your PI (if it is properly configured) or use the IP address to be safer. The address of your printer should be similar to the one in the image:
http://hostname-or-ip-of-your-pi:631/printers/Printer_Name
Click Next and Windows will attempt to connect.
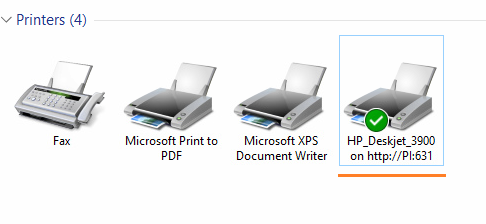
If it succeeds, it will ask you for the driver. Select it from the available list or provide a driver disk. Once done, the printer will show up in the Devices and Printer list.
 If connection fails, click the back button and double check the address.
The procedure is similar for Windows 8.1, 8 and 7 with slight variations in dialogs appearance.
This works with Windows 10, but with Windows 11 it is not possible to connect to the printer. Any solution?
Hello from Austria
This was the only description I’ve found that works.
Now I had success after long, long time of searching and trying.
Many Thanks!
Pingback: Canon MF3110 + Windows10 + Raspberry Pi – Martin Petriska's Blog
This — http://username:password@hostnameornumber:631/printers/the_printer Standard username password for URL’s
Thank you. I had tried tp set up my IP printer twice (on a PIZERO with CUPS which all worked fine) with no success and finally, this worked. I had thought that an IPP printer would have to use the TCPIP option, but actually, as you show, this is not the case.
What if the printer requires authentication? Is there a Url scheme to pass user/password?