
There are plenty of TVs to chose from and nowadays they all know DVB-C so why go through all the trouble of building a TV player with a Raspberry PI?
Well… because it’s fun and because of the freedom of being able to watch your favourite TV channel on any of your devices – even when away.
Prerequisites
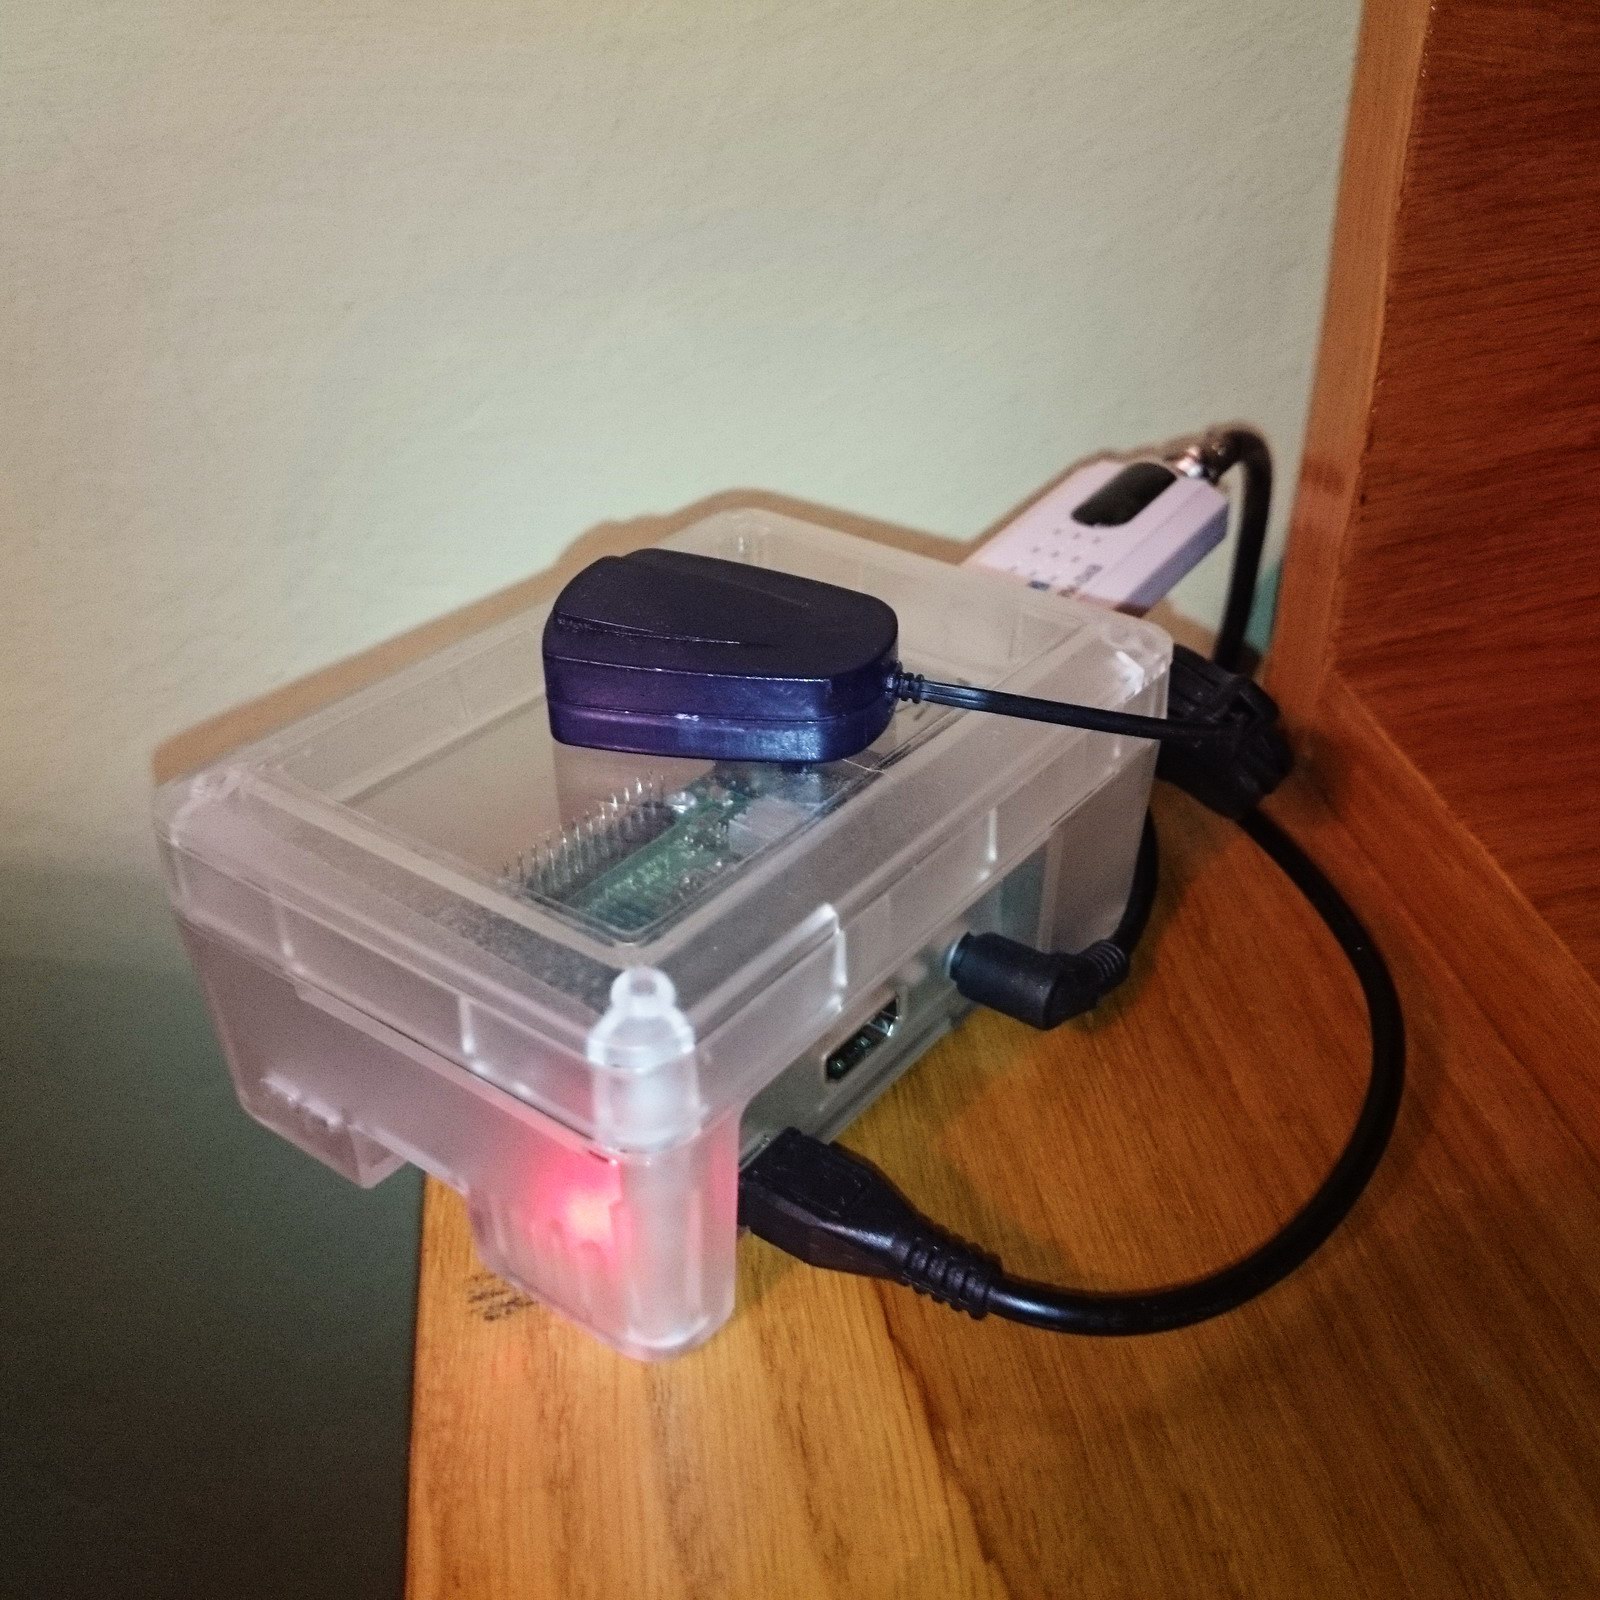
- Raspberry PI 2 or 3 (up and running)
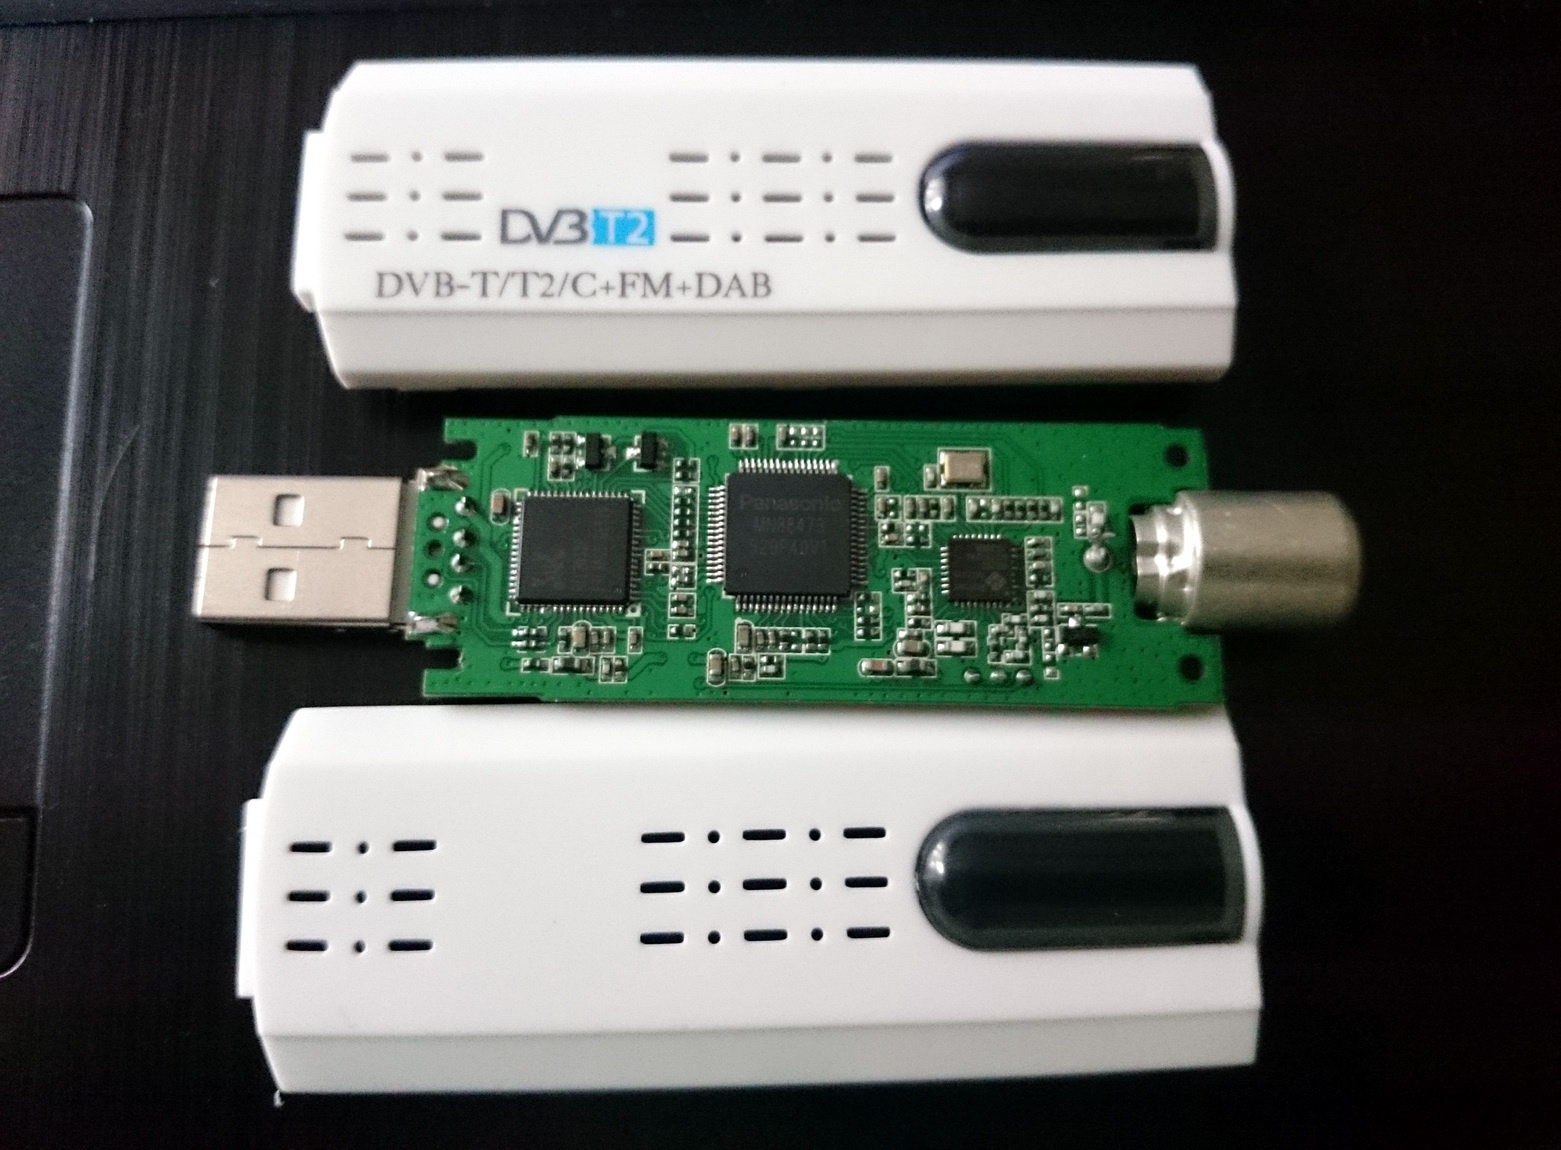
- A DVB-C (T/S) tuner that works with OpenELEC/LibreELEC – I used a cheap unnamed unbranded DVB-T/T2/C + DAB + FM tuner off eBay
System Setup
Prepare an SD card with your ELEC image. I initially used OpenELEC, unfortunately, while my no-name tuner was recognized by the kernel, the required firmware was not present and it didn’t work. So I searched for solutions and found LibreELEC, an alternative ELEC that bundles plenty more drivers for various tuners.
0. Plug the SD it into the PI, power it on, wait to boot and run the initial setup wizard.
Tvheadend
- From Kodi navigate to System » Settings » Addons » Install from Repository » LibreELEC Repository » Services. Install and enable Tvheadend 4.0 (Version 4.2 offers some extra features but it didn’t work for me – it randomly failed to find the DVB-C part of my tuner, leaving me with only the DVB-T chip enabled).
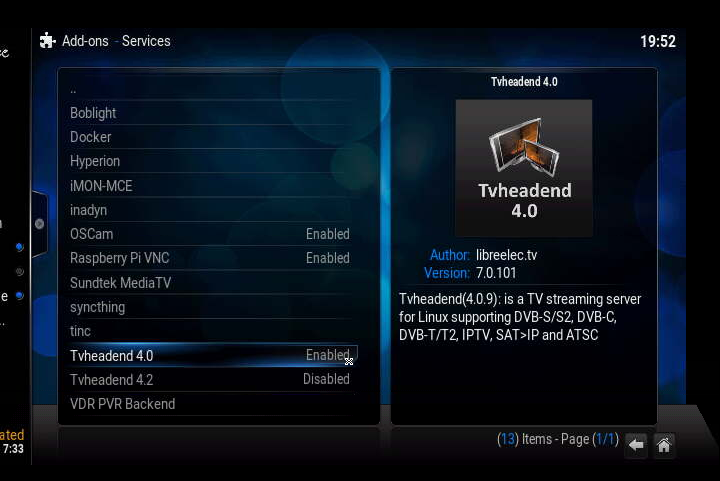
While you’re there you can install other addons you may want.
2. Tvheadend’s configuration is done through a web interface, available on port 9981 on the PI. Open up a browser and access (where 192.168.0.14 is your PI’s network IP address – the PI needs to be connected to the network for this part.)
3. Navigate to Configuration » DVB Inputs » TV Adapters and check that your tuner is properly recognized. If it isn’t, you may need to try / wait for a newer LibreELEC release or get a different tuner.
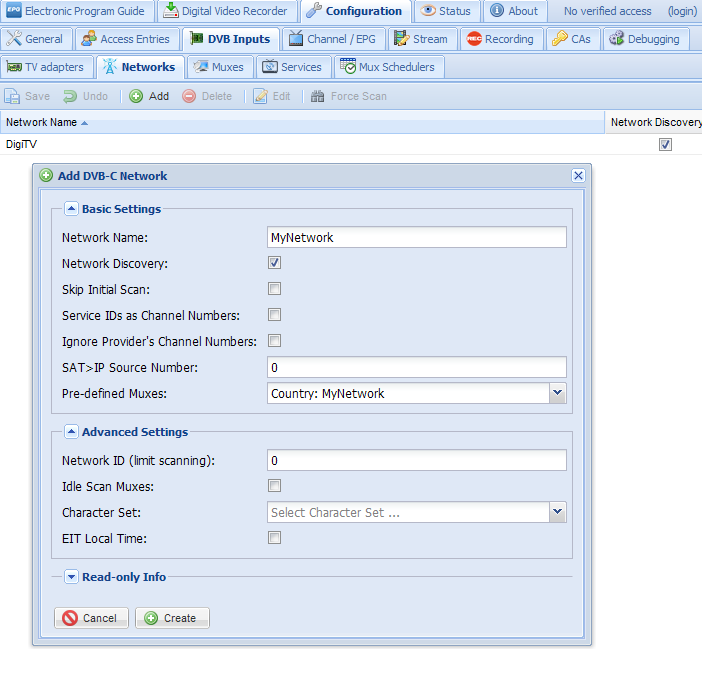
4. From Configuration » DVB Inputs » Networks click on the Add button. Enter a name for your network, uncheck Skip Initial Scan and select your country/provider from the Pre-defined Muxes list (if your network is not on there you’ll need to manually add the muxes at the next step).
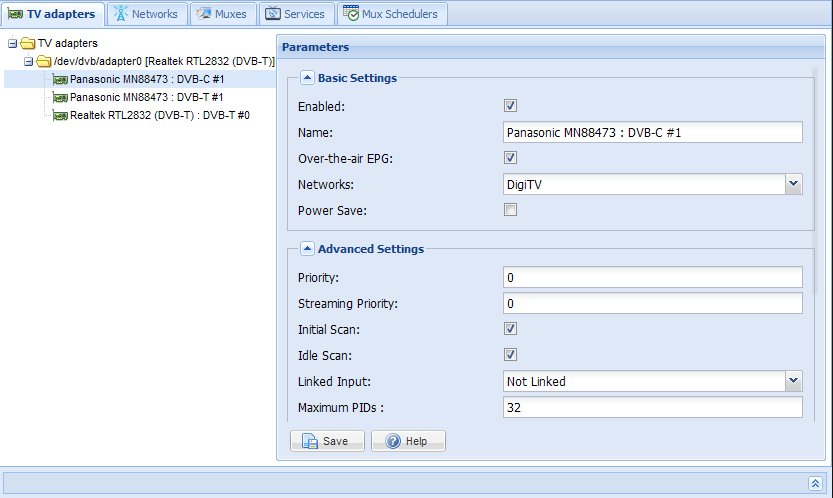
5. Return to the TV Adapters section and click on your tuner from the list. In the parameters window check Enabled, Initial Scan and Idle Scan then select your network from the Networks list. Click Save.
6. Move on to Configuration » DVB Inputs » Muxes. You should see the list of predefined muxes for your provider. Look at the Scan Status and Scan Result columns – after a while the Status will cycle from PEND(ing) to SCAN(ning) and the Result columns will display either OK or FAIL. The Services and Channels columns will also change and display the number of channels included in each working mux.
Note: This will not happen if you forgot to uncheck Skip Initial Scan. In this case you can return to the Networks tab and click the Force Scan button.
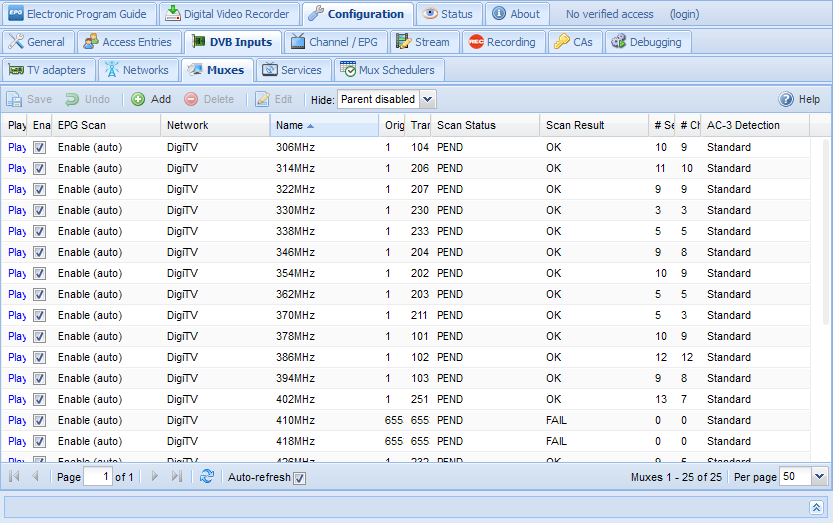 Wait for the scan to complete before continuing.
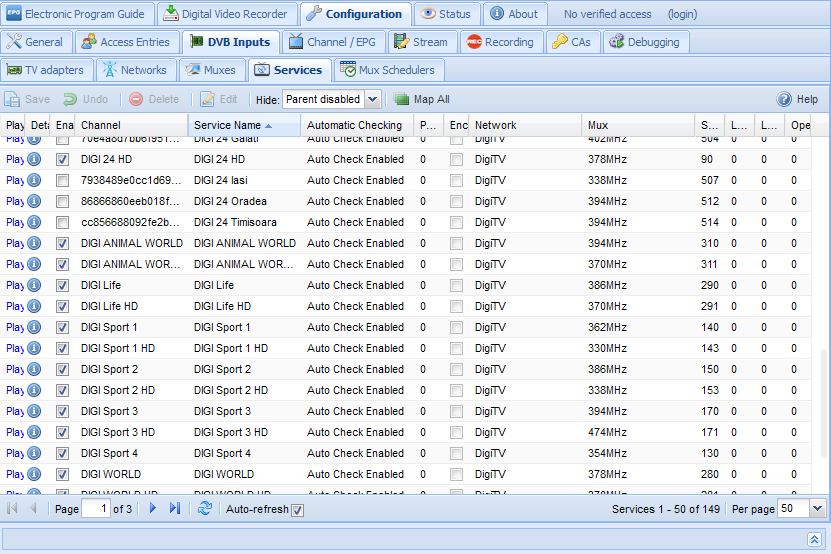
7. After all muxes are done scanning you’ll get a list of services in Configuration » DVB Inputs » Services. Click on Map All to generate the channels list. You can select to skip encrypted or unavailable services (your provider may broadcast more than TV/radio channels through the system). You can follow the progress under Status » Service Mapper
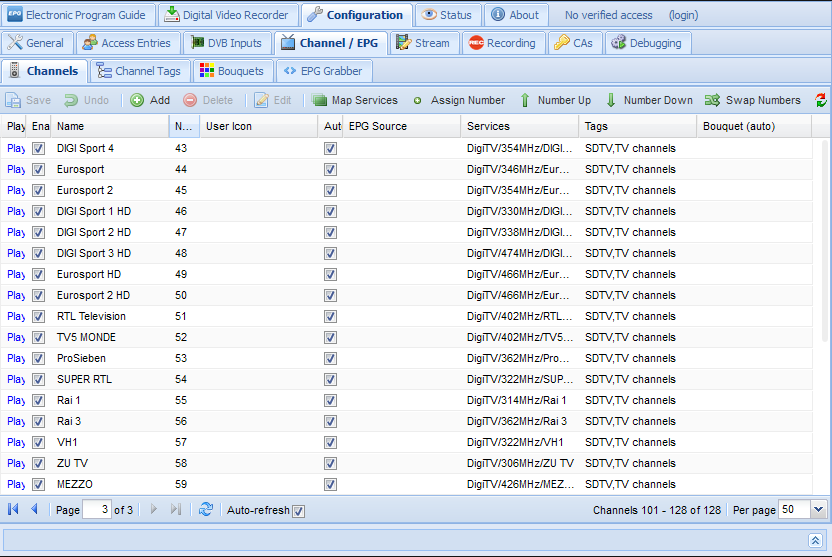
8. The channels will be displayed under Configuration » Channel / EPG » Channels. This is also where you can disable some and reorder them (by setting a value to the Number column for each channel).
Kodi
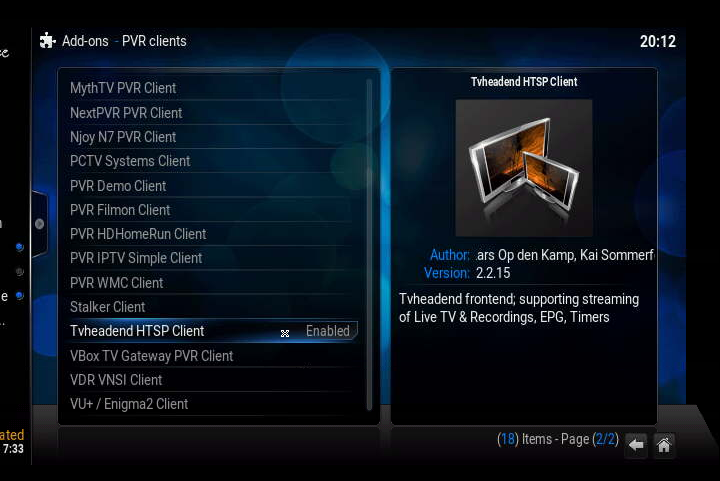
9. From System » Settings » Addons » Install from Repository » LibreELEC Repository » PVR Clients install and enable Tvheadend HTSP Client.
10. Go to System » Settings » TV » General and enable PVR support. Wait for the plugin to communicate with the backend and retrieve the channels list (you should see some progress notification in the top right part of the screen).
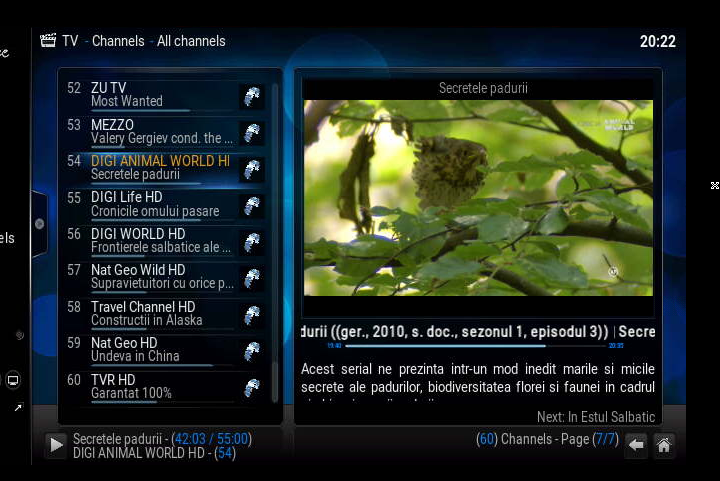
If everything is working, you can now return to the main screen of Kodi and the TV section to watch your favourite channel.
Additionally, you can use extra clients like Kodi itself (with the same Tvheadend RTSP client – just configure it to connect to PI’s LAN ip instead of 127.0.0.1) or TVHGuide (for Android) to watch TV on other devices than the PI itself. Remember that you can only watch on a single device at a time (the tuner can only tune-in on a single channel).
To Do
Find a way to enable stream transcoding – the 3-4MB/s for SD and 10-12MB/s for HD are a bit on the high side for my taste (the HD streams even buffer at times on my N 300mbps wireless) and definitely too high for off-location streaming.
Extra Info
These instructions were tested to work with LibreELEC 7, Kodi 16, TVHeadend 4.0. Updating any of these to a newer version resulted in intermittent tuner detection, making me return to the older versions.
Hello Lucian,
And thanks for answering me!
So can you tell me where I can follow the new tutorial with the different DVB-C tuner?
Thank you
Mostrar citação
Great article: DVB- C on RPi with Kodi- LibreElec !
Hard to find DVB- C, and great description of set-up
Questions:
1. Is it possible to have a multi-year tuner RPi ? That is, perhaps use two IR receivers on GPIO pins to operate 2 LIRC remote control units.
Can TVHeadend or similar VLC handle two different output streams from VGA and HDMI?
2. The combo DVB- T/T2/C + DAB + FM from DV3 costs about $18. The rtl-sdr DVB- T costs about $10, both with remote, antenna and accessories.
Could one find a cheap DVB- C only device for $10?
3. Have you tried DVB- C with PiZero? Does it have sufficient specs?
Cheers,
A. Mian
Toronto.