VMware Server for Linux was great back in the day. Unfortunately it was discontinued and I’ve been searching for a headless VM manager for running and remotely managing virtual machines on Linux ever since.
VirtualBox seems the best solution for the task so far, as it is capable of running headless on Linux and has an (unofficial but good) web interface to manage it.
Preparations
Start by adding the VirtualBox repositories in CentOS:
cd /etc/yum.repos.d

wget http://download.virtualbox.org/virtualbox/rpm/rhel/virtualbox.repo
Make sure dkms and kernel-devel are installed (as they will be needed for module compilation):
yum install dkms kernel-devel
In some weird instances (you haven’t updated in a long while and a new kernel has been released in the meantime), you will get a different kernel-devel version than the running one, causing VirtualBox installation to fail at compiling the needed modules.
To solve this, either reboot the server to activate the latest kernel or, if some weird instance compels you to use the older kernel, manually download and install it’s headers from the CentOS Vault (replace the version in the link with your own release and architecture):
http://vault.centos.org/6.5/updates/x86_64/Packages/
Install VirtualBox
You can now move on with the installation
yum install VirtualBox-4.3
If you’re reading this far into the future, you’ll most likely install a newer version…
Once done, double check that you did not get any module compilation errors; these steps should return OKs:
Trying to register the VirtualBox kernel modules using DKMS [  OK  ]

Starting VirtualBox kernel modules [  OK  ]
Add all users which will be using VirtualBox to the vboxusers group:
usermod -a -G vboxusers user1

usermod -a -G vboxusers user2
Set up VirtualBox’s web service by creating the /etc/default/virtualbox file with the following content:
VBOXWEB_USER=user1
VBOXWEB_HOST=localhost
VBOXWEB_PORT=18083
Then start the web service with:
service vboxweb-service start
Set it to run at boot with
chkconfig vboxweb-service on
Set up phpVirtualBox
phpVirtualBox requires the php-soap module, so make sure to install it:
yum install php-soap
Grab phpVirtualBox from http://sourceforge.net/projects/phpvirtualbox/ and extract it to your preferred location (you should already have a webserver on the system running and serving content).
Rename phpVirtualBox’s config.php-sample to config.php and edit it to add one of the administration users:
/* Username / Password for system user that runs VirtualBox */
var $username = 'user1';
var $password = 'randomuser1pass';
/* SOAP URL of vboxwebsrv (not phpVirtualBox's URL) */
var $location = 'http://127.0.0.1:18083/';
Navigate to
http://yourwebserver/phpvirtualbox-installation-path/
and log in (default login is admin / admin).
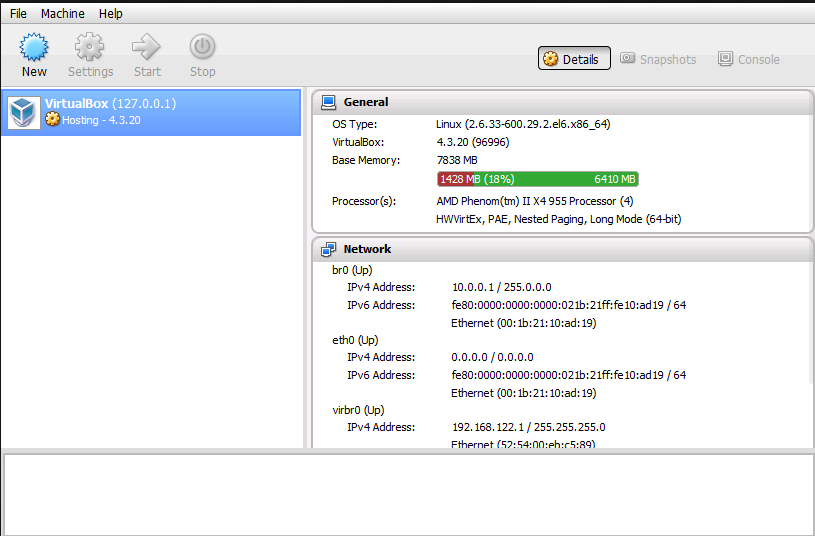
If all went well so far, you’ll be greeted by the administration interface
Install Extensions Pack
Some features (like USB support, clipboard sharing, shared folders and video acceleration) require the Extensions Pack. To install it, first find out the exact version of VirtualBox you are using:
vboxmanage -v
then download the appropriate version of the pack from http://download.virtualbox.org/virtualbox/
Last step is to install it, using:
vboxmanage extpack install <.vbox-extpack file>
For best practices you should install the extension pack as the user running VirtualBox.
Possible issues
1. If you notice that phpVirtualBox stops communicating after a while with vboxwebsrv which outputs
SQPmp #### SOAP FAULT: Too many open files [SOAP-ENV:Server]
take a look at this support ticket and try the suggested solution:
authconfig --disablefingerprint --update
2. If logins on a new phpVirtualbox / VirtualBox setup fail with
Error logging in to vboxwebsrv.
Make sure selinux is not blockign the connection by adding the necessary permissions:
yum install -y policycoreutils-python

semanage port -a -t http_port_t -p tcp 18083
3. If you’re having trouble with remote desktop being unavailable although the extension package is installed, try to also install it as the user VirtualBox is running under – normally vbox:
su vbox

vboxmanage extpack install <.vbox-extpack file>
4. If remote desktop is available, but you can’t connect to it, make sure Virtualbox opens the VRDE ports on the right host IP (run this under the correct user):
VBoxManage modifyvm machine_name --vrdeaddress 10.0.0.1
For phpvirtualbox 5.2 and newer, make sure to set the correct configuration variable for this:
/* Set the standard VRDE Port Number / Range, e.g. 1010-1020 or 1027 */

var $vrdeports = '9000-9100';

/* Set the default VRDE address, e.g. 192.168.1.1 */

var $vrdeaddress = '10.0.0.1';
It is also possible to enter 0.0.0.0 as configuration IP address to allow connections on any interface available on the host machine.


