

Some of the smart power plugs I’m using to monitor power usage appear to report incorrect (wrong multiplier) information when viewed in Home Assistant through the Tuya bridge. The information is fine directly in the Tuya app(s), so the app is probably doing some data processing behind the hood. I’ve so far only had this issue with some Gosund plugs I own – namely the EP2 and SP111 models, the P1 power strip works fine. Other brands (Blitzwolf, Nous) have not been as problematic.

Unfortunately, there’s no way of correcting this directly in the devices/entities as managed by Home Assistant. As can be seen in the comparison image above, the values as reported to HA are multiplied by 10 (most likely the decimal placement is mishandled or ignored completely). To correct them the values will need to be divided back by 10.
To display (and use) the corrected values in HA we need to (manually) create some aliases and manipulate the values. This can be done in HA’s main configuration.yaml file. This file is not directly configurable, so we’ll first need the file editor addon, which can be installed through Settings > Addons > Addons Store and searching for File Editor.
Once that’s done, access the File Editor entry in the main menu, use the folder icon to open the files list and select configuration.yaml from the list. This will open the file in the editor window to the right.
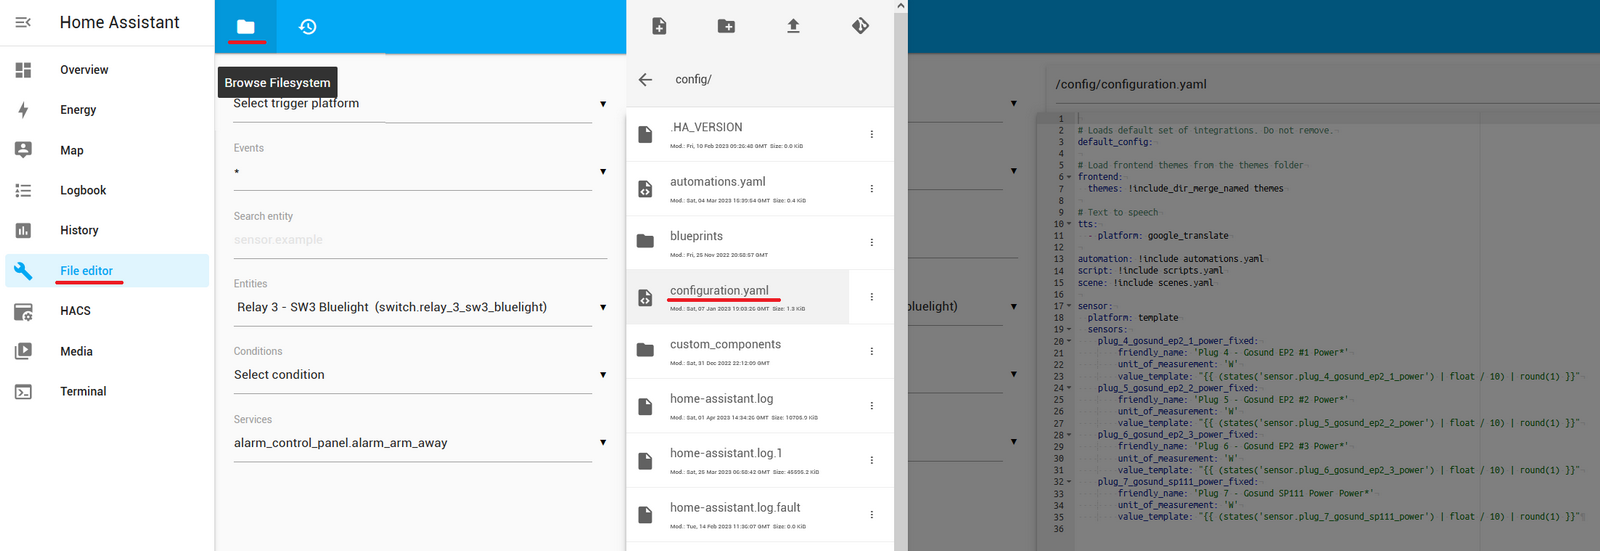
Here we can enter additional configuration parameters to HA, we’ll be using it to define sensor aliases that apply the value corrections to the real sensors. Note that sensors are identified by their IDs (viewable in the Settings > Devices & Services > Entities list). These IDs are device (and sensor) dependent and will change when adding/removing/renaming devices or sensors.
I’m only interested in the power (Watts) data, so I’m only manipulating the specific sensors responsible for that. I have 4 entity IDs to work with:
sensor.plug_4_gosund_ep2_1_power
sensor.plug_5_gosund_ep2_2_power
sensor.plug_6_gosund_ep2_3_power
sensor.plug_7_gosund_sp111_power
For the sake of future clarity, the corrected aliases have the same names with a _fixed string appended. I’m using the configuration entries below:
sensor:
  platform: template
  sensors:
    plug_4_gosund_ep2_1_power_fixed:
        friendly_name: 'Plug 4 - Gosund EP2 #1 Power*'
        unit_of_measurement: 'W'
        value_template: "{{ (states('sensor.plug_4_gosund_ep2_1_power') | float / 10) | round(1) }}"
    plug_5_gosund_ep2_2_power_fixed:
        friendly_name: 'Plug 5 - Gosund EP2 #2 Power*'
        unit_of_measurement: 'W'
        value_template: "{{ (states('sensor.plug_5_gosund_ep2_2_power') | float / 10) | round(1) }}"
    plug_6_gosund_ep2_3_power_fixed:
        friendly_name: 'Plug 6 - Gosund EP2 #3 Power*'
        unit_of_measurement: 'W'
        value_template: "{{ (states('sensor.plug_6_gosund_ep2_3_power') | float / 10) | round(1) }}"
    plug_7_gosund_sp111_power_fixed:
        friendly_name: 'Plug 7 - Gosund SP111 Power Power*'
        unit_of_measurement: 'W'
        value_template: "{{ (states('sensor.plug_7_gosund_sp111_power') | float / 10) | round(1) }}"
The configuration lines define new (alias) sensor IDs and set their (visible) names, measurement unit and values (computed from the original sensors numbers by dividing by 10). There are 4 such sets for the 4 different (power plug) entities. Aliases can be created for any sensors (entities) reported by the devices, not just power.
This block should be added at the end of the existing configuration. If a sensor block already exists, you’ll need to merge the new data to the existing one.
The editor does some syntax validation and will display a green checkbox in the top right corner when all is well or a red exclamation mark if something’s wrong. When done, click the bit red save button to commit the changes.

Changes to the configuration files don’t take instant effect, the configuration needs to be reloaded in HA. This can be done from the Developer Tools, also found in the main sidebar menu.
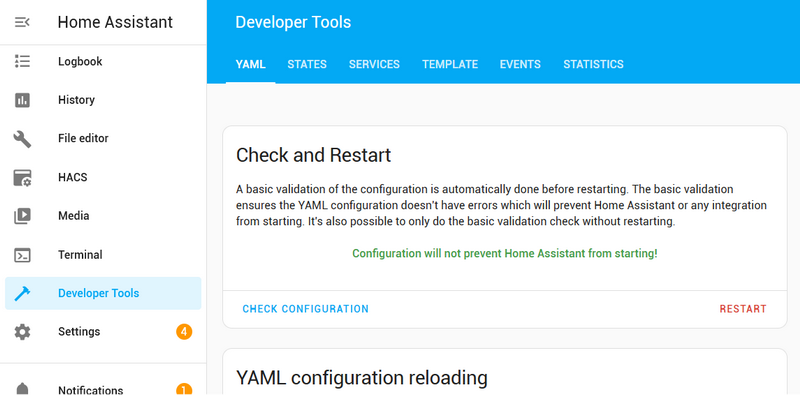
Clicking the Check Configuration link should validate and confirm that the configuration is correct and safe to use (with a distinct green message). Only then it is safe to use the Restart link to instruct HA to reload itself with the new configuration. This may take some time depending on the device running HA.
Do NOT restart it if the configuration validation fails as you may end up with a non-working HA instance.
Once the restart is complete, the new (alias) sensor is usable in the dashboard (or automation tasks):

Notice the presence of both the original sensors and (new) corrected alias – the original entities remain available in HA so use clear names to tell them apart.
PS: The two configuration sections are accessible through their URLs manually:
- File editor: http://homeassistant:8123/core_configurator/dashboard
- Developer tools: http://homeassistant:8123/developer-tools/yaml